How to Replace Spark Plugs Yourself: A DIY Guide
July 12, 2026 16 min read 3,187 words
Unlock better engine performance and fuel economy by learning to change your spark plugs with confidence.
Start Your DIY Tune-Up
Understanding Spark Plugs and Why DIY Replacement Matters
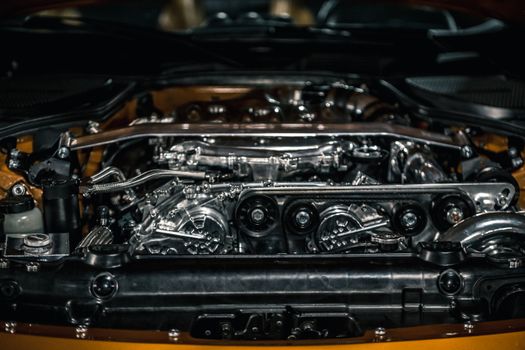 Photo: Erik Mclean / Pexels
Spark plugs are small but mighty components, playing a critical role in your internal combustion engine. Essentially, they are responsible for igniting the air-fuel mixture in your engine's cylinders, creating the controlled explosions that power your vehicle. Without properly functioning spark plugs, your engine simply wouldn't run. Over time, spark plugs wear out. The constant exposure to extreme heat, pressure, and electrical discharges causes the electrodes to erode and the gap to widen. This wear and tear leads to a less efficient spark, which in turn can cause a variety of problems for your vehicle. These issues include reduced fuel economy, a noticeable decrease in engine performance, rough idling, misfires, and even difficulty starting your car.
Many modern vehicles use long-life spark plugs, often made of iridium or platinum, which can last for 60,000 to 100,000 miles or more. However, even these advanced plugs require eventual replacement. Ignoring the manufacturer's recommended service intervals for spark plug replacement is a common mistake that can lead to more significant and costly engine problems down the line. A worn spark plug puts extra strain on other ignition components, such as ignition coils, potentially leading to their premature failure.
Deciding to learn how to replace spark plugs yourself offers several compelling benefits. Firstly, it's a significant cost-saver. Professional spark plug replacement can be expensive, with labor costs often exceeding the price of the parts themselves. By performing the job at home, you eliminate these labor charges entirely. Secondly, it's an excellent opportunity to deepen your understanding of your vehicle's mechanics. As you work through the process, you'll become more familiar with your engine bay, helping you identify other potential issues or simply gain confidence in performing basic maintenance. This empowerment can lead to greater self-reliance and a sense of accomplishment. Thirdly, performing regular maintenance like this can extend the lifespan of your vehicle and ensure it runs optimally for years to come. It’s a proactive step in preventing more serious mechanical failures.
Before diving into the specifics of the replacement process, it's crucial to understand the different types of spark plugs and why selecting the correct ones for your vehicle is paramount. There are traditional copper plugs, which are economical but have a shorter lifespan; platinum plugs, which offer better durability; and iridium plugs, which are the longest-lasting and most efficient, often found in newer vehicles. Your vehicle's owner's manual or an
auto parts store will specify the exact type and heat range required. Using the wrong type of spark plug can negatively impact engine performance and potentially damage your engine. Always consult your vehicle's manufacturer recommendations to ensure compatibility and optimal function. This foundational knowledge will set you up for a successful DIY spark plug replacement.
Essential Tools and Safety Precautions for Your Spark Plug Project
 Photo: Auto Records / Pexels
Embarking on a DIY spark plug replacement requires more than just knowing the steps; it demands the right tools and a steadfast commitment to safety. Preparing your workspace and gathering all necessary equipment beforehand will make the process smoother and safer.
**Key Tools You'll Need:**
* **Spark Plug Socket:** This is a specialized socket, typically 5/8", 13/16", or 16mm, often with a rubber insert to protect the ceramic insulator of the spark plug and hold it securely during removal and installation. Make sure it's the correct size for your vehicle.
* **Ratchet:** A standard 3/8-inch drive ratchet is usually sufficient. An extension bar or universal joint might be necessary to reach plugs in tight spaces.
* **Torque Wrench:** This is arguably the most critical tool for spark plug installation. Over-tightening can strip threads or crack the spark plug's porcelain insulator, while under-tightening can lead to compression leaks and overheating. Always tighten to the manufacturer's specified foot-pounds or Newton-meters.
* **Spark Plug Gap Tool:** While many modern spark plugs come pre-gapped, it's always wise to double-check and adjust if necessary, especially for older vehicles or specific plug types.
* **Dielectric Grease:** This non-conductive, silicone-based grease helps prevent corrosion and ensures a good seal for the ignition coil boots or spark plug wires.
* **Anti-Seize Compound:** A small amount applied to the spark plug threads can prevent them from seizing in the cylinder head, making future removal much easier. Ensure it's suitable for high temperatures.
* **Gloves:** Protect your hands from grime, heat, and sharp edges.
* **Safety Glasses:** Crucial for protecting your eyes from debris or fluids.
* **Flashlight or Work Light:** Essential for illuminating dimly lit engine compartments.
* **Compressed Air or Shop Vacuum:** To clean around the spark plug wells before removal, preventing debris from falling into the combustion chamber.
* **Pliers (needle-nose or locking):** May be needed to disconnect stubborn electrical connectors or hoses.
**Safety First:**
* **Engine Off and Cool:** Never work on a hot engine. Allow your vehicle to cool down completely, ideally for several hours, to prevent burns and ensure components are not seized from heat.
* **Disconnect Battery:** For added safety, especially when working with electrical components, disconnect the negative terminal of your car battery. This prevents accidental shorts or electrical shocks.
* **Ventilation:** If using any cleaning sprays or solvents, ensure you're working in a well-ventilated area.
* **Read Your Owner's Manual:** Always consult your vehicle's owner's manual for specific instructions, torque specifications, and any unique considerations for your model.
* **One Plug at a Time:** To avoid mixing up ignition coil wires or spark plug boots, work on one spark plug from start to finish before moving to the next. This maintains the correct firing order.
* **Cleanliness:** Keep your work area clean. Debris falling into the open spark plug holes can cause severe engine damage.
By gathering these tools and meticulously following safety guidelines, you'll be well-prepared to tackle your spark plug replacement with confidence and minimize any potential risks. Remember, patience and precision are your best allies in this automotive endeavor. Always prioritize your safety and the longevity of your vehicle.
Step-by-Step Guide to a Successful Spark Plug Replacement
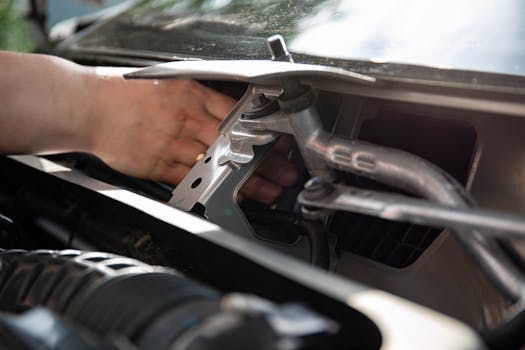 Photo: Sergey Meshkov / Pexels
With your tools ready and safety precautions in mind, it's time to dive into the practical steps of replacing your spark plugs. This guide is generalized, so always refer to your vehicle's specific service manual for exact procedures and torque specifications.
**Step 1: Preparation and Engine Access.**
Ensure your engine is completely cool. Pop the hood and identify the location of your spark plugs. On most modern engines, they are located under ignition coils, which sit directly on top of the spark plugs. On older vehicles, you might see spark plug wires leading to them. You may need to remove engine covers, air intake components, or other obstacles to gain clear access. Use your compressed air or shop vacuum to thoroughly clean around the base of each spark plug well. This is crucial to prevent dirt, dust, or debris from falling into the combustion chamber when the old plug is removed.
**Step 2: Disconnecting Ignition Coils/Wires.**
Work on one spark plug at a time. This is paramount to avoid mixing up the firing order, which can cause significant engine problems. Carefully disconnect the electrical connector from the ignition coil. There's usually a tab or clip you need to press or slide. Once disconnected, gently pull the ignition coil straight up and off the spark plug. If your vehicle uses spark plug wires, grasp the boot, not the wire, and twist slightly while pulling to remove it. Inspect the coils or wires for any cracks, fraying, or damage; if found, consider replacing them. Place the coil or wire in a position where it won't interfere with your work but also won't get dirty.
**Step 3: Removing the Old Spark Plug.**
Insert your spark plug socket into the spark plug well, ensuring it seats firmly onto the hex of the spark plug. Attach your ratchet (and extension, if needed). Loosen the spark plug by turning counter-clockwise. Be firm but avoid excessive force, especially if the plug feels seized. If it's very tight, a small amount of penetrating oil might help, but be cautious not to get it into the combustion chamber. Once loosened, continue unscrewing until the plug is free. The rubber insert in your spark plug socket should hold the plug securely as you lift it out. Inspect the old spark plug. Its appearance can tell you a lot about your engine's health (e.g., oil fouling, carbon deposits, or a lean/rich mixture). Compare it to diagrams online for diagnostic insights.
**Step 4: Preparing and Installing the New Spark Plug.**
Before installing the new plug, check its gap using a spark plug gap tool, even if it's pre-gapped. Refer to your vehicle's specifications. If adjustment is needed, use the gapping tool carefully to bend the ground electrode. Apply a thin coat of anti-seize compound to the threads of the new spark plug. Be careful not to get any on the electrode or the porcelain insulator. This prevents seizing and makes future removal easier. Now, very gently, thread the new spark plug into the cylinder head by hand. This is critical to avoid cross-threading, which can severely damage the cylinder head. Turn it clockwise until it's finger-tight. If you feel any resistance, stop, unscrew, and try again. Once finger-tight, use your torque wrench to tighten the spark plug to the manufacturer's specified torque. Do NOT overtighten. Over-tightening can crack the spark plug or strip the threads in the cylinder head, leading to extremely expensive repairs.
Consult your vehicle's manual or a reliable repair database for precise torque specs.
**Step 5: Reconnecting and Testing.**
Apply a small amount of dielectric grease to the inside of the ignition coil boot or spark plug wire boot. This helps create a good seal and prevents moisture intrusion. Reinstall the ignition coil or spark plug wire, ensuring it clicks firmly into place and the electrical connector is securely reattached. Double-check all connections. Once all spark plugs are replaced and everything is reconnected, replace any engine covers or components you removed. Start your engine. Listen for any unusual sounds, misfires, or rough idling. If the engine runs smoothly, take it for a short test drive to confirm everything is working correctly. You should notice improved performance and possibly better fuel economy. If you encounter any issues, retrace your steps or consult a professional mechanic.
Common Pitfalls and Pro Tips for DIY Spark Plug Replacement
 Photo: Anastasia Shuraeva / Pexels
While replacing spark plugs yourself is a rewarding task, being aware of common mistakes and incorporating expert tips can make the difference between a smooth operation and a frustrating ordeal. Here's what to watch out for and how to ensure success:
**Common Pitfalls to Avoid:**
* **Cross-threading New Plugs:** This is perhaps the most damaging mistake. If a new spark plug is not threaded perfectly straight and by hand initially, it can strip the threads in the cylinder head, requiring costly repairs like re-tapping or even cylinder head replacement. Always start threading by hand.
* **Overtightening:** As mentioned, overtightening can crack the spark plug's porcelain, damage the plug's internal components, or strip cylinder head threads. Under-tightening is also an issue, leading to compression leaks and potentially overheating the plug.
* **Ignoring Torque Specifications:** Relying on 'feel' instead of a torque wrench for spark plugs is a gamble. Every vehicle and spark plug type has a specific torque spec for a reason.
* **Mixing Up Wires/Coils:** If you remove all spark plug wires or ignition coils at once without labeling, you risk installing them in the wrong firing order. This will cause severe misfires or prevent the engine from starting.
* **Dropping Debris into Cylinder:** Failing to clean around the spark plug wells before removal means dirt, dust, or even small rocks can fall into the combustion chamber, leading to engine damage.
* **Working on a Hot Engine:** Not only is this a burn hazard, but hot metal expands, making it harder to remove old plugs and increasing the risk of stripping threads.
* **Using the Wrong Spark Plugs:** Installing plugs with the incorrect heat range, gap, or material can lead to poor performance, misfires, or even engine damage.
* **Damaging Electrical Connectors:** Forcing stubborn electrical connectors can break the plastic tabs, leading to loose connections and potential misfires.
**Pro Tips for a Seamless Experience:**
* **Take Photos:** Before you start disconnecting anything, take several pictures of the engine bay from different angles. These photos can be invaluable if you forget how something goes back together.
* **Label Everything:** If your vehicle uses spark plug wires, label each one with its corresponding cylinder number. For coil-on-plug systems, work one at a time to avoid confusion.
* **Use a Universal Joint/Swivel Socket:** For hard-to-reach spark plugs, a universal joint or a swivel-head spark plug socket can be a lifesaver, allowing you to get the correct angle.
* **Extend Your Reach:** Long extensions for your ratchet are often necessary to clear engine components and reach deep spark plug wells.
* **Inspect Old Plugs:** The condition of your old spark plugs can be a diagnostic tool. Look for signs of oil fouling, carbon buildup, or abnormal wear, which could indicate other engine issues.
* **Apply Dielectric Grease Liberally (on boots):** This helps protect against moisture and corrosion, making future removal easier and ensuring a good electrical connection.
* **Listen to Your Engine:** After replacement, start the engine and listen carefully. Any new ticks, knocks, or rough idling should prompt immediate investigation.
* **Clear Codes:** If your 'Check Engine' light was on due to spark plug issues, you might need an OBD-II scanner to clear the diagnostic trouble codes after the replacement.
By heeding these warnings and implementing these pro tips, you'll significantly increase your chances of a successful and stress-free spark plug replacement, saving you time, money, and potential headaches.
