✓ Headlight replacement can often be a DIY task, saving significant labor costs.
✓ Different vehicles have varying headlight assembly designs; always consult your owner's manual.
✓ There are several types of headlight bulbs, including halogen, LED, and HID, each with unique installation considerations.
✓ Proper alignment after replacement is crucial for road safety and to avoid blinding other drivers.
How It Works
1
Identify Bulb Type & Gather Tools
Determine whether your car uses halogen, LED, or HID bulbs. Collect essential tools like screwdrivers, wrenches, and gloves.
2
Access the Headlight Assembly
Locate the headlight assembly, which may require removing grille clips, fender liners, or even the bumper on some vehicles.
3
Replace the Bulb or Assembly
Carefully disconnect the electrical connector, unclip or unscrew the old bulb/assembly, and install the new one without touching the glass of new bulbs.
4
Test & Reassemble
Before fully reassembling, test the new headlights to ensure they function correctly. Then, secure all components and check alignment.
Understanding Your Car's Headlight System
Photo: Jakub Pabis / Pexels
Before diving into how to replace car headlights, it’s crucial to understand the anatomy of your vehicle’s lighting system. Modern cars utilize a variety of headlight technologies, each with its own characteristics, benefits, and replacement procedures. The most common types include halogen, HID (High-Intensity Discharge), and LED (Light Emitting Diode) headlights. Halogen bulbs are the traditional standard, offering a warm, yellowish light. They are generally the easiest and most affordable to replace, often requiring just a simple bulb swap. HID headlights, also known as Xenon lights, produce a brighter, whiter light and are typically found in higher-end vehicles. Their replacement can be more complex due to the presence of ballasts and ignitors, which convert the car's 12V power into the high voltage needed for operation. LED headlights are the newest technology, offering superior brightness, energy efficiency, and a longer lifespan. While the bulbs themselves are solid-state and rarely fail, if a component of an LED headlight system does go out, it often requires replacing the entire headlight assembly rather than just a bulb. This can significantly increase the cost and complexity of the replacement process.
Beyond the bulb type, you need to consider whether you're replacing just the bulb or the entire headlight assembly. A bulb replacement is necessary when a light simply burns out. An assembly replacement, however, is usually required if the headlight housing is cracked, yellowed, fogged, or if internal components (like an LED module) have failed. Yellowing or hazing of the plastic lens, known as headlight oxidation, can severely reduce light output even if the bulb is functional. While restoration kits can temporarily improve this, a new assembly provides a crystal-clear, long-lasting solution. Each vehicle model has a unique headlight design and access method. Some cars offer straightforward access from under the hood, while others demand the removal of the bumper, fender liners, or other body panels. Consulting your vehicle’s owner’s manual is not just recommended; it’s often essential to identify the exact procedure and necessary tools for your specific make and model. This initial understanding prevents frustration and potential damage during the replacement process. Knowing your headlight type and the extent of the repair (bulb vs. assembly) will dictate the tools you need, the parts you purchase, and the overall difficulty of the task. For more insights on general car maintenance, check out our guide on essential car care tips.
Gathering Tools and Preparing for Headlight Replacement
Photo: Artem Podrez / Pexels
Proper preparation is key to a successful and frustration-free headlight replacement. The right tools can make a seemingly daunting task much simpler. While the specific tools will vary based on your vehicle and the type of replacement (bulb vs. assembly), a basic toolkit for headlight work typically includes a set of screwdrivers (Phillips and flathead), a ratchet and socket set (metric for most modern vehicles), pliers, and a trim removal tool. The trim removal tool is particularly useful for safely prying off plastic clips and panels without causing damage. For those working with HID systems, rubber gloves are highly recommended to avoid touching the bulb glass, which can leave oils that create hot spots and shorten bulb life. Similarly, for all bulb types, handling the glass portion of the new bulb with bare hands should be avoided; use clean gloves or a cloth.
Before you even open your toolbox, ensure your vehicle is parked on a level surface, the engine is off, and the parking brake is engaged. For added safety, consider disconnecting the negative terminal of your car battery, especially if you're working with electrical components or replacing an entire assembly, to prevent accidental shorts or shocks. Next, identify the correct replacement bulb or assembly. This information is usually found in your owner's manual, on the old bulb itself, or through an online parts catalog using your vehicle's make, model, and year. Double-check that you have purchased the correct part before starting the job, as incorrect bulbs may not fit or function properly.
Once you have your tools and parts ready, it's time to assess the access to your headlights. Some vehicles provide direct access to the back of the headlight housing from the engine bay. Others, particularly newer models with compact engine compartments, require more extensive disassembly. This might involve removing the front grille, loosening or removing parts of the front bumper, or even accessing from within the wheel well by removing the fender liner. Don't be intimidated by these steps; they are often designed to be reversible. Take photos with your phone as you disassemble components. This visual record will be invaluable when it comes time to reassemble everything correctly. Lay out removed parts in an organized manner so you know which screw or clip goes where. This methodical approach will save you time and prevent missing components during reinstallation. Remember, patience is a virtue, especially when dealing with plastic clips and delicate electrical connectors.
Step-by-Step Guide: How to Replace Car Headlights Effectively
Photo: Abdulvahap Demir / Pexels
Once you've prepared your workspace and gathered all necessary tools and parts, you’re ready to tackle the actual replacement. This detailed guide covers the general steps for how to replace car headlights, but always refer to your specific vehicle's owner's manual for precise instructions.
**Step 1: Gaining Access.** As mentioned, this is often the most variable step. For many cars, you'll open the hood and look behind the headlight assembly. You might see a dust cover, a wiring harness, or mounting screws. For others, you may need to remove plastic trim, the grille, or even partially unbolt the bumper. Use your trim removal tools carefully to avoid scratching paint or breaking plastic tabs. If you're removing the bumper, ensure you have a safe place to rest it to prevent damage. Disconnect any fog light or sensor wiring connected to the bumper before fully removing it.
**Step 2: Disconnecting the Electrical Connector.** Once you have access to the back of the headlight, locate the electrical connector plugged into the bulb or assembly. These usually have a tab that needs to be pressed or a lever that needs to be flipped to release them. Gently pull the connector straight off. Avoid yanking on the wires, as this can damage the harness.
**Step 3: Removing the Old Bulb/Assembly.**
* **For Bulb Replacement (Halogen, HID):** After disconnecting the electrical connector, you’ll typically find a retaining clip, spring, or twist-lock mechanism holding the bulb in place. For halogen bulbs, you might rotate the bulb counter-clockwise to unlock it, or unclip a wire retaining spring. For HID bulbs, there might be additional clips or a small ignitor unit attached directly to the bulb. Carefully remove the old bulb, making sure to note its orientation.
* **For Assembly Replacement (LED or Damaged Housing):** If you're replacing the entire assembly, you'll need to locate and remove all mounting bolts or screws. These are usually visible around the perimeter of the headlight housing. Once all fasteners are removed, carefully pull the assembly out of its mounting position. Be mindful of any additional wiring (e.g., for turn signals, daytime running lights) that might still be connected. Disconnect these before fully removing the old assembly.
**Step 4: Installing the New Bulb/Assembly.**
* **For Bulb Replacement:** Handle the new bulb carefully, especially halogen and HID bulbs, avoiding touching the glass with your bare hands. The oils from your skin can create hot spots, leading to premature failure. Insert the new bulb into the housing, ensuring it's correctly oriented (some bulbs have a specific keyway). Secure it with the retaining clip, spring, or twist-lock mechanism.
* **For Assembly Replacement:** Guide the new headlight assembly into its mounting position. Reconnect any auxiliary wiring (turn signals, DRLs) that you disconnected from the old assembly. Secure the new assembly with all the mounting bolts or screws you removed earlier.
**Step 5: Reconnecting Electrical and Testing.** Reconnect the main electrical connector to the new bulb or assembly. Before reassembling any body panels, turn on your vehicle and test the new headlights. Check both low beams and high beams. If everything works, proceed to the final reassembly. If not, recheck your connections and ensure the bulb is seated correctly. Sometimes, a faulty new bulb can be the culprit.
**Step 6: Reassembly and Alignment.** Carefully reattach any removed components like grilles, bumpers, or fender liners, referring to your photos for guidance. Ensure all clips and screws are securely fastened. After installation, it’s highly recommended to check your headlight alignment. Improper alignment can blind oncoming drivers or reduce your own visibility. You can often perform a basic alignment yourself using a garage wall, but for precise adjustment, a visit to a mechanic or service center is advisable. This ensures optimal light distribution and road safety. For general automotive maintenance, consider checking out our guide on maintaining car battery health.
Common Mistakes and Expert Tips for Headlight Longevity
Photo: Tima Miroshnichenko / Pexels
Replacing car headlights can be straightforward, but several common mistakes can turn it into a frustrating or even damaging experience. Avoiding these pitfalls and implementing expert tips can ensure a smoother process and extend the life of your new lights.
**Common Mistakes to Avoid:**
* **Touching the Bulb Glass with Bare Hands:** This is perhaps the most frequent and detrimental mistake, especially for halogen and HID bulbs. Oils from your skin create hot spots on the bulb's surface, leading to premature failure. Always use clean gloves or a cloth when handling the glass portion of new bulbs.
* **Incorrect Bulb Type or Size:** Using a bulb that isn't designed for your vehicle can lead to improper fit, poor light output, or even damage to the electrical system. Always cross-reference your owner's manual or a reliable parts catalog.
* **Forcing Components:** If a part isn't fitting, don't force it. This often means something is misaligned, or you're using the wrong part. Forcing can break delicate plastic tabs, connectors, or even the headlight housing itself.
* **Not Disconnecting the Battery (for assembly replacement):** While not always strictly necessary for bulb changes, if you're replacing the entire assembly or working extensively with wiring, disconnecting the negative battery terminal prevents accidental short circuits or electrical shocks.
* **Improper Reassembly:** Rushing the reassembly of body panels can lead to loose components, rattling noises, or even damage to the vehicle's aesthetics. Take your time and ensure all clips and screws are securely fastened.
* **Ignoring Headlight Alignment:** Replacing a bulb or assembly can slightly alter the headlight's aiming. Failing to realign them can result in blinding oncoming traffic or severely reducing your own nighttime visibility, creating a significant safety hazard.
**Expert Tips for Headlight Longevity:**
* **Invest in Quality Bulbs:** While cheaper bulbs might save money upfront, they often have shorter lifespans and lower light output. Spending a little more on reputable brands can offer better performance and durability.
* **Replace in Pairs:** If one headlight bulb burns out, the other is often not far behind. Replacing both at the same time ensures consistent light output and avoids having to repeat the process soon after.
* **Regularly Clean Headlight Lenses:** Dirt, grime, and road salt can accumulate on your headlight lenses, reducing light output. A simple wipe down with a mild soap solution and a soft cloth can make a noticeable difference.
* **Consider Lens Protection:** For vehicles prone to headlight yellowing, consider applying a UV-protective film or coating after cleaning or replacing the assembly. This can significantly slow down the oxidation process.
* **Check Wiring and Connectors:** Before installing a new bulb, quickly inspect the wiring harness and connectors for any signs of corrosion, fraying, or damage. A faulty connection can prevent a new bulb from working or lead to intermittent issues.
* **Professional Alignment for Assemblies:** While basic alignment can be done DIY, if you've replaced an entire headlight assembly, a professional alignment at a service center using specialized equipment will ensure optimal and safe light distribution.
By being mindful of these common mistakes and adopting these expert tips, you can ensure a successful headlight replacement and enjoy improved visibility and safety for years to come. Your car's headlights are a critical safety feature, and maintaining them properly is an investment in your driving well-being.
Comparison
Feature
Halogen Bulbs
HID (Xenon) Bulbs
LED Headlight Assembly
Cost (Parts)
$10-$30
$50-$150
$200-$1000+
Brightness
Good
Excellent
Superior
Lifespan
500-1,000 hrs
2,000-3,000 hrs
10,000-50,000 hrs
Installation Difficulty (DIY)
Easy
Moderate
Moderate to Difficult
Energy Efficiency
Low
Medium
High
Color Temperature
Warm Yellow
Cool White/Blue
Pure White
What Readers Say
★★★★★
"This guide made how to replace car headlights on my Subaru so much easier. I saved over $150 by doing it myself, and the instructions were clear and precise. Highly recommend for any DIYer."
David M. · Austin, TX
★★★★★
"My Ford F-150's headlight went out, and I was dreading the cost. Following this article, I successfully replaced the bulb in about 30 minutes. The section on tools was especially helpful."
Sarah J. · Miami, FL
★★★★★
"After reading this, I felt confident enough to tackle replacing a cracked headlight assembly on my Honda Civic. The step-by-step photos I took during disassembly, as suggested, were a lifesaver for reassembly!"
Mark T. · Seattle, WA
★★★★★
"The guide was mostly excellent for replacing my Chevy's headlight bulb. I found the access a bit trickier than described for my specific model, but the core steps were spot on."
Emily R. · Denver, CO
★★★★★
"As a new car owner, I appreciate how thoroughly this article explained everything from bulb types to safety tips. It empowered me to not only replace a bulb but also understand the entire headlight system."
Chris P. · Chicago, IL
Frequently Asked Questions
What is the average cost to replace car headlights professionally?
The professional cost to replace a car headlight can vary widely, from $100-$300 for a single bulb replacement to $400-$1500+ for an entire assembly, depending on the vehicle's make, model, and the type of headlight technology (halogen, HID, LED). DIY can save significantly on labor.
Is it safe to replace car headlights myself?
Yes, it is generally safe to replace car headlights yourself, provided you follow proper safety precautions like turning off the engine, using appropriate tools, and, for assembly replacements, potentially disconnecting the battery. The primary risk is often damaging delicate plastic components or improper bulb handling.
How do I know what type of headlight bulb my car needs?
The easiest way to determine your car's headlight bulb type is to consult your vehicle's owner's manual. Alternatively, you can typically find the bulb type printed on the base of the old bulb itself, or use an online parts finder by inputting your car's make, model, and year.
Why do some car headlight replacements require bumper removal?
Many modern car designs prioritize aerodynamics and compact engine compartments, which can limit direct access to the headlight assembly from under the hood. Removing the bumper or fender liner provides the necessary space to unbolt and replace the entire headlight unit or sometimes even just the bulb.
Should I replace both headlights if only one is out?
It is highly recommended to replace both headlights at the same time if one bulb burns out. Headlight bulbs typically have similar lifespans, so if one fails, the other is likely to follow soon. Replacing both ensures consistent light output and color temperature, improving overall nighttime visibility and safety.
Who should replace their car headlights themselves?
Anyone with basic mechanical aptitude, a willingness to follow instructions (especially their car's owner's manual), and the right tools can successfully replace their car headlights. It's a great way to save money on labor costs for a relatively common maintenance task.
What are the risks of improper headlight alignment?
Improper headlight alignment poses significant safety risks. Headlights aimed too high can blind oncoming drivers, increasing the risk of accidents. Headlights aimed too low or too far to the side drastically reduce your own visibility, making it harder to see obstacles, road signs, and hazards at night.
Will LED headlights become standard in all new cars?
LED headlights are rapidly becoming the standard in new cars due to their superior energy efficiency, longer lifespan, and design flexibility compared to halogen and HID. While halogen may persist in entry-level models for some time, the trend clearly indicates a future where LED technology dominates automotive lighting.
Empower yourself to tackle car maintenance tasks like how to replace car headlights. With this comprehensive guide, you have the knowledge and confidence to ensure your vehicle is safe and visible on the road. Don't let a dim light compromise your safety – take action today!

 Photo: Jakub Pabis / Pexels
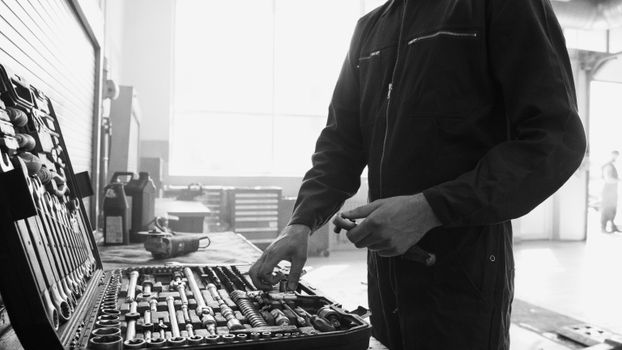 Photo: Artem Podrez / Pexels
 Photo: Abdulvahap Demir / Pexels
 Photo: Tima Miroshnichenko / Pexels