
DIY: How to Install New Brake Pads Safely & Effectively
how to install new brake pads

DIY: How to Install New Brake Pads Safely & Effectively

Master the process of replacing your vehicle's brake pads with confidence and precision, ensuring optimal safety.

Start Your Brake Job

Key Takeaways

  • ✓ Brake pads typically last 30,000 to 70,000 miles, depending on driving habits.
  • ✓ Ignoring worn brake pads can lead to costly rotor damage and unsafe driving conditions.
  • ✓ A DIY brake pad replacement can save you hundreds of dollars compared to shop rates.
  • ✓ Proper tools and safety precautions are essential for a successful and safe brake job.

How It Works

1
Gather Tools & Safety Gear

Before starting, ensure you have all necessary tools like a jack, jack stands, lug wrench, and C-clamp. Prioritize safety with gloves and eye protection.

2
Lift Vehicle & Remove Wheel

Safely lift your vehicle using a jack and secure it with jack stands. Remove the lug nuts and carefully take off the wheel to expose the brake assembly.

3
Remove Old Brake Pads

Locate the caliper bolts and remove them to access the old brake pads. Carefully slide out the worn pads, noting their orientation for new pad installation.

4
Install New Pads & Reassemble

Compress the caliper piston, install the new brake pads and hardware, then reassemble the caliper. Reattach the wheel, lower the vehicle, and pump the brakes.

Understanding Your Braking System: Why Pad Replacement Matters
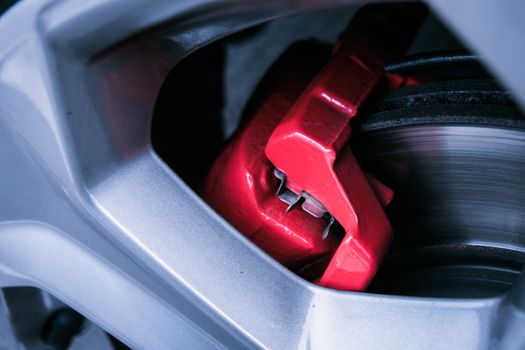
Detailed photo of a red automotive brake caliper and disc brake in focus. Photo: Tuesday Temptation / Pexels
Before diving into the practical steps of how to install new brake pads, it's crucial to understand the role they play in your vehicle's overall safety and performance. Your car's braking system is a complex network designed to convert kinetic energy into thermal energy, effectively slowing and stopping your vehicle. At the heart of this system are the brake pads, which are friction materials pressed against the brake rotors by the calipers. When you press the brake pedal, hydraulic pressure forces the caliper piston to squeeze the brake pads against the spinning rotors. This friction is what brings your car to a halt. Over time, this friction causes the brake pads to wear down. This wear is a normal part of their operation, but if left unaddressed, it can lead to significant problems. Worn brake pads lose their effectiveness, increasing your stopping distance and compromising your ability to react to sudden hazards. Beyond safety concerns, severely worn pads can cause metal-on-metal contact between the caliper and the rotor, leading to irreversible damage to your brake rotors. Replacing rotors is a far more expensive and time-consuming repair than simply replacing pads. Furthermore, worn pads can lead to uneven braking, pulling your vehicle to one side, or causing vibrations through the steering wheel and brake pedal. These symptoms are not just annoying; they indicate a compromised braking system that needs immediate attention. Understanding these fundamentals underscores the importance of timely brake pad replacement, not just for your wallet, but for the safety of yourself and others on the road. This guide will empower you to perform this critical maintenance task yourself, ensuring your vehicle remains safe and reliable. Regular inspection of your brake pads, typically every 10,000 to 15,000 miles, or at least once a year, is a good habit to adopt. Look for visible wear, listen for squealing or grinding noises, and pay attention to how your brake pedal feels. A spongy or very low brake pedal can also indicate issues. For more information on maintaining your vehicle's essential components, check out our guide on understanding car fluid checks. Knowing when and how to address these issues is key to prolonging your vehicle's life and ensuring peak performance.

Essential Tools and Safety Precautions for Your DIY Brake Job

Embarking on a DIY brake pad replacement, or learning how to install new brake pads, requires more than just enthusiasm; it demands the right tools and a steadfast commitment to safety. Skimping on either can turn a straightforward maintenance task into a dangerous ordeal or a frustrating failure. Before you even think about loosening a lug nut, gather all the necessary equipment. You'll need a reliable floor jack and sturdy jack stands – never rely solely on a jack to support your vehicle. A lug wrench (or impact wrench) is essential for wheel removal. For the brake components themselves, you'll need a C-clamp or a specialized brake caliper piston compression tool to push the piston back into the caliper, a set of metric and/or standard wrenches and sockets to remove caliper bolts, and a wire brush for cleaning the caliper bracket. Brake cleaner spray is also highly recommended to remove brake dust and grime, and a torque wrench is crucial for tightening bolts to manufacturer specifications, preventing both overtightening and undertightening. Beyond tools, safety is paramount. Always wear appropriate personal protective equipment (PPE), including safety glasses to protect against flying debris and brake dust, and gloves to shield your hands from grease, dirt, and brake fluid. Brake dust, in particular, can contain harmful substances, so avoid inhaling it. Work on a flat, level surface, and ensure your vehicle is in park (or gear for manual transmissions) with the parking brake engaged. Chock the wheels that are not being lifted to prevent any accidental movement. Before beginning work, allow your vehicle to cool down if you've recently driven it, as brake components can become extremely hot. Never work under a vehicle supported only by a jack. Always use jack stands, placing them on sturdy frame points, not on suspension components or the exhaust. If you're unsure about any step, consult your vehicle's service manual or seek professional advice. The goal is not just to successfully install new brake pads, but to do so safely, ensuring your own well-being and the integrity of your vehicle. Remember that proper preparation and adherence to safety guidelines are the foundations of any successful automotive repair. Having the right tools also makes the job significantly easier, reducing frustration and the likelihood of damaging components. For instance, a good quality ratcheting wrench can save a lot of time and effort when dealing with tight caliper bolts. Always double-check that all connections are secure and torqued to spec before taking your car for a test drive. This meticulous approach ensures that your hard work results in a safe and effective braking system.

Step-by-Step Guide: How to Install New Brake Pads

Now that you're equipped with the right tools and a safety-first mindset, let's walk through the detailed process of how to install new brake pads. This guide covers a typical disc brake system, which is common in most modern vehicles. **Step 1: Prepare Your Vehicle.** Park your car on a level surface, engage the parking brake, and if you have a manual transmission, put it in gear. If it's an automatic, ensure it's in park. Loosen the lug nuts on the wheel you'll be working on, but don't remove them yet. **Step 2: Lift and Secure the Vehicle.** Using your floor jack, lift the vehicle until the wheel is off the ground. Place jack stands securely under the vehicle's frame, near the jack points, and slowly lower the vehicle onto the stands. Once stable, remove the lug nuts and the wheel. **Step 3: Access the Brake Caliper.** You'll see the brake caliper covering the rotor. Depending on your vehicle, there might be one or two guide pins or bolts holding the caliper in place. These are usually located on the back of the caliper. Use your wrench or socket to remove these bolts. Sometimes, you only need to remove the bottom bolt and pivot the caliper up, but often, removing both is easier. **Step 4: Remove Old Brake Pads.** Once the caliper is loose, carefully slide it off the rotor. You might need to gently pry it if it's stuck. Do not let the caliper hang by the brake hose, as this can damage the hose. Use a bungee cord or wire to suspend the caliper from the suspension spring or another sturdy component. The old brake pads will either fall out or can be easily pulled out of the caliper bracket. Note their orientation, especially if they have wear indicators. **Step 5: Inspect and Clean.** Now is a good time to inspect your brake rotors for deep grooves, warping, or excessive wear. If they appear damaged, they may need to be resurfaced or replaced. Clean the caliper bracket where the pads sit with a wire brush to remove rust and brake dust. Apply a thin layer of high-temperature brake grease to the contact points where the new pads will slide. **Step 6: Compress the Caliper Piston.** This is a critical step. Before installing new, thicker pads, you need to push the caliper piston back into its bore to make room. Use a C-clamp and an old brake pad (or a specialized piston compression tool) to slowly and evenly push the piston back. Be aware that this will push brake fluid back into the master cylinder reservoir, so check the fluid level and remove some if it's overfilled. **Step 7: Install New Brake Pads.** Install any new hardware (shims, clips) that came with your new pads onto the caliper bracket. Then, slide the new brake pads into place, ensuring they are oriented correctly. Apply a thin layer of brake grease to the back of the pads where they contact the caliper piston and caliper bracket. **Step 8: Reassemble the Caliper.** Carefully slide the caliper back over the new pads and rotor. Reinstall the caliper guide pins/bolts and tighten them to the manufacturer's specified torque. If your pads came with new guide pin boots or grease, use them. **Step 9: Reinstall Wheel and Final Checks.** Reinstall the wheel, hand-tighten the lug nuts, and then lower the vehicle. Once on the ground, torque the lug nuts to the manufacturer's specifications in a star pattern. Before driving, get into the car and pump the brake pedal several times until it feels firm. This seats the pads against the rotor and pushes the caliper piston out. Check your brake fluid reservoir one last time. For more advanced maintenance tips, consider learning about how to diagnose engine warning lights.

Common Mistakes to Avoid and Tips for Longevity

Even with a clear understanding of how to install new brake pads, certain pitfalls can lead to suboptimal performance or even dangerous situations. Being aware of these common mistakes and adopting best practices can significantly improve the outcome of your DIY brake job and extend the life of your new components. **Common Mistakes to Avoid:** * **Not using jack stands:** This is perhaps the most dangerous mistake. Never work under a vehicle supported only by a jack. Jack stands provide crucial stability. * **Forgetting to compress the piston:** Trying to force the caliper over new pads without compressing the piston will not work and can damage the caliper. * **Not cleaning caliper bracket:** Old rust and debris prevent new pads from sliding freely, leading to uneven wear and noise. * **Improper lubrication:** Applying grease to the friction surface of the pad or not using high-temperature brake grease can cause issues. Only lubricate contact points. * **Over- or under-torquing bolts:** Caliper bolts and lug nuts need to be tightened to specific values. Overtightening can strip threads or stretch bolts, while undertightening can lead to components coming loose. * **Not 'bedding in' new pads:** New pads need a proper break-in period to transfer a layer of friction material to the rotors, ensuring optimal performance and reducing noise. * **Letting the caliper hang by the hose:** This can damage the brake hose, leading to brake fluid leaks and brake failure. **Tips for Longevity and Optimal Performance:** * **Choose quality pads:** Don't skimp on brake pads. Invest in reputable brands that offer good stopping power and durability for your driving style. * **Replace hardware:** Always use the new hardware (clips, shims) that often comes with new brake pads. These components are crucial for proper pad movement and noise reduction. * **Bleed brakes if necessary:** If you open the brake fluid system or suspect air has entered, you'll need to bleed the brakes to remove air bubbles. * **Bed-in your new brakes:** After installation, perform a series of moderate stops from varying speeds (e.g., 60-10 mph, 40-5 mph) without coming to a complete stop, allowing the pads to cool between cycles. This process, known as 'bedding in,' helps the pads conform to the rotors. * **Regular inspections:** Make it a habit to visually inspect your brake pads and rotors during tire rotations or oil changes. Early detection of wear can prevent more costly repairs. * **Drive defensively:** Aggressive braking wears pads down faster. Anticipate stops and brake smoothly to extend pad life. By avoiding these common errors and following these tips, you'll not only successfully install new brake pads but also ensure they perform optimally and last longer, contributing to a safer and more enjoyable driving experience.

Comparison

FeatureDIY Brake Pad ReplacementProfessional Shop ServiceMobile Mechanic Service
Cost SavingsHigh (Parts only)Low (Parts + Labor)Medium (Parts + Reduced Labor)
Time Commitment2-4 hours per axle1-2 hours drop-off/pickup1-2 hours at your location
Skill Level RequiredIntermediate to AdvancedNoneNone
Tools RequiredExtensive (Jack, Stands, etc.)NoneNone
Warranty on WorkNone (Self-warranty)Typically 12-24 monthsTypically 6-12 months
Learning Experience
ConvenienceWork at your paceDrop-off/PickupService at your home/work

What Readers Say

"This guide on how to install new brake pads was incredibly detailed and easy to follow. I saved over $300 doing it myself, and my brakes feel fantastic. Highly recommend for anyone comfortable with a wrench."

David R. · Austin, TX

"I was nervous about tackling my brakes, but the step-by-step instructions and safety tips made all the difference. My car stops smoothly, and I feel so accomplished. Thank you!"

Sarah L. · Denver, CO

"After reading this article, I successfully replaced all four brake pads on my SUV. The detailed tool list and common mistakes section were particularly helpful, preventing me from making rookie errors."

Mark T. · Miami, FL

"The guide was mostly excellent, though I found compressing the piston a bit tricky on my specific model. Still, with some persistence, I got it done and saved a significant amount of money. Great resource."

Jessica P. · Seattle, WA

"As a new car owner, learning how to install new brake pads seemed daunting. This article broke it down perfectly, giving me the confidence to maintain my vehicle. My brakes are quiet and responsive now."

Carlos M. · Chicago, IL

Frequently Asked Questions

How often should I replace my brake pads?

Brake pad lifespan varies significantly based on driving habits, vehicle type, and pad material. Generally, they last between 30,000 to 70,000 miles. It's best to inspect them regularly, typically during tire rotations or oil changes, and replace them when they reach their minimum thickness (usually 3-4mm) or when you hear squealing/grinding noises.

Is it safe to replace brake pads myself?

Yes, replacing brake pads yourself can be safe if you follow proper procedures, use the correct tools, and prioritize safety precautions like using jack stands. However, if you're unsure or uncomfortable at any point, it's always best to consult a professional mechanic to ensure your vehicle's braking system is safe.

What tools do I need to install new brake pads?

You'll need a floor jack, jack stands, lug wrench, C-clamp (or brake caliper piston tool), appropriate sized wrenches/sockets for caliper bolts, a wire brush, brake cleaner, and potentially a torque wrench. Safety glasses and gloves are also essential personal protective equipment.

How much does it cost to replace brake pads DIY vs. professionally?

A DIY brake pad replacement typically costs only the price of the parts, which can range from $30-$100 per axle for standard pads. Professionally, you can expect to pay $150-$300 per axle, including parts and labor, potentially more if rotors need resurfacing or replacement. DIY offers significant savings.

Should I replace brake rotors when I install new brake pads?

It's not always necessary to replace rotors with every pad change. However, it's highly recommended to at least have them inspected. If rotors are warped, have deep grooves, or are below their minimum thickness specification, they should be resurfaced or replaced to ensure optimal braking performance and pad longevity.

Who should attempt to install new brake pads themselves?

Individuals with a basic understanding of automotive mechanics, comfortable using hand tools, and a commitment to following safety protocols are good candidates for a DIY brake pad replacement. It's an excellent learning experience and a great way to save money on car maintenance.

What are the risks of not replacing worn brake pads?

Ignoring worn brake pads can lead to several serious risks, including increased stopping distances, reduced braking effectiveness, damage to brake rotors (leading to more expensive repairs), uneven braking that pulls the vehicle, and ultimately, a higher risk of accidents due to compromised stopping power.

Are there any new technologies in brake pads I should consider?

Yes, brake pad technology is constantly evolving. Ceramic pads offer quieter operation and less dust, while semi-metallic pads provide strong stopping power and are durable. Low-metallic organic pads are a good all-around option. Consider your driving style and vehicle type when choosing, and research the latest advancements for improved performance and longevity.

Empower yourself with the knowledge of how to install new brake pads and take control of your vehicle's maintenance. By following this comprehensive guide, you can ensure your car's safety, save money, and gain invaluable automotive experience. Don't wait until it's too late – give your brakes the attention they deserve today.

Topics: how to install new brake padsreplace brake padsDIY brake jobautomotive repaircar maintenance
Leo List

DK Escorts LU Escorts AT Escorts SE Escorts FI Escorts CH Escorts DE Escorts HR Escorts IE Escorts GR Escorts CZ Escorts NO Escorts BE Escorts FR Escorts SI Escorts IL Escorts NL Escorts PL Escorts HU Escorts ES Escorts IT Escorts PT Escorts SK Escorts RO Escorts ZA Escorts UY Escorts US Escorts UK Escorts NZ Escorts AU Escorts
Brampton weed
Adultwork EstrelaBet Vai de Bet R7 Bet Betão Galera Bet Rainbet Bet9ja Shop SportyBet BetKing Sisal Loto Foot Hollywoodbets YesPlay Odibets RushBet Jugabet BetWarrior BetCity MSport betPawa Fortebet