
 Photo: Erik Mclean / Pexels
DIY Brake Pads: How to Replace Brake Pads Yourself Safely
Empower yourself to maintain your vehicle's most critical safety system and save significant money on auto repairs.
Start Your Repair NowKey Takeaways
- ✓ Replacing brake pads yourself can save you hundreds of dollars compared to professional service.
- ✓ Regular brake pad inspection and replacement are crucial for vehicle safety and performance.
- ✓ Most brake pad replacements can be completed with basic tools and some mechanical aptitude.
- ✓ Ignoring worn brake pads can lead to more costly damage to rotors and calipers.
How It Works
Before starting, ensure you have all necessary tools like a jack, jack stands, lug wrench, and appropriate safety equipment. Preparation is key to a smooth and safe replacement process.
Safely lift your vehicle using a jack and secure it with jack stands. Once the vehicle is stable, use a lug wrench to remove the wheel, exposing the brake assembly.
Carefully unbolt the caliper, retract the caliper piston, and slide out the old brake pads. Pay attention to how the old pads are seated and the orientation of any hardware.
Install the new brake pads and hardware, ensuring proper fitment. Reassemble the caliper, remount the wheel, and repeat the process for other wheels as needed.
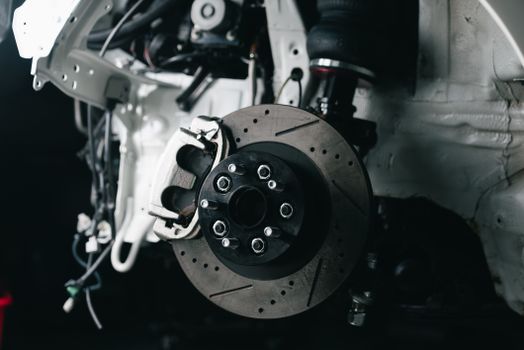
Understanding Your Brake System: Why Replacement Matters
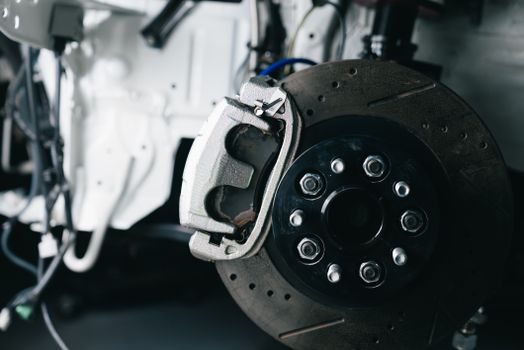 Photo: Erik Mclean / Pexels
Gathering Your Tools and Parts: What You'll Need
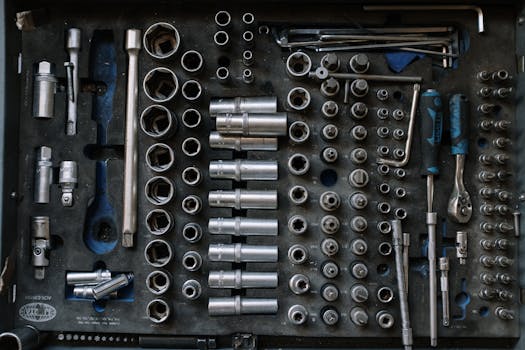 Photo: cottonbro studio / Pexels
Step-by-Step Guide: How to Replace Brake Pads Yourself
Common Mistakes and Expert Tips for DIY Brake Pad Replacement
Comparison
| Feature | DIY Pad Replacement | Professional Service | Dealership Service |
|---|---|---|---|
| Cost (Parts) | Medium | Medium | Medium |
| Cost (Labor) | Free | High | Very High |
| Time Investment | 2-4 Hours | 1-2 Hours | 1-3 Hours |
| Learning Curve | Medium | None | None |
| Control over Parts | ✓ | ✗ | ✗ |
| Warranty on Labor | ✗ | ✓ | ✓ |
| Convenience | Schedule your own | Drop-off/Pickup | Drop-off/Pickup |
| Tools Required | Specific Set | Specialized Shop | Specialized Shop |
What Our Readers Say
"I used this guide to replace brake pads myself on my Honda Civic, and it was incredibly detailed. I saved over $300 compared to the local shop quote. The car stops perfectly now!"
David R. Austin, TX"As a first-timer, I was nervous about tackling my brakes. This article broke down how to replace brake pads yourself into easy, manageable steps. Felt so accomplished afterwards!"
Sarah L. Denver, CO"The safety tips and tool list were spot on. I replaced pads and rotors on my F-150 following this guide, and the entire process took about 3 hours per axle. Fantastic results and huge savings."
Mark T. Chicago, IL"The guide was mostly excellent, though I did need a special tool for my specific car's rear caliper piston that wasn't explicitly mentioned for all vehicles. Still, the general steps for how to replace brake pads yourself were very helpful."
Jessica M. Portland, OR"I've always paid mechanics for brake jobs, but with this guide, I learned how to replace brake pads myself. The detailed instructions on the bed-in process made a noticeable difference in brake feel."
Tom W. Miami, FLFrequently Asked Questions
How often should I replace brake pads?
Is it safe to replace brake pads myself?
Do I need to replace brake rotors when I replace pads?
How much does it cost to replace brake pads myself versus professionally?
What's the difference between ceramic, semi-metallic, and organic brake pads?
Who should attempt to replace brake pads themselves?
What are the risks of not replacing worn brake pads?
Are there any advanced brake systems that make DIY replacement harder?
Empower yourself by learning how to replace brake pads yourself. Not only will you save money, but you'll gain invaluable knowledge and confidence in maintaining your vehicle's crucial safety system. Take the first step towards becoming your own automotive expert today!